Introduction to Rendology
Rendology is a 3D rendering pipeline based on Glium and written in Rust. It features basic implementations of shadow mapping, deferred shading, a glow effect, FXAA and instanced rendering. In this blog post, I’ll outline some of the concepts of Rendology and describe how they came to be this way.
Rendology defines shaders in a decomposed fashion, which allows writing functions that successively transform shaders. This addresses the problem that arises when allowing arbitrary combinations of the above effects as well as allowing users to implement custom scene shaders. Then, the pipeline guides users through drawing a frame by mimicking a finite-state automaton on the type level. Drawing a frame looks somewhat like this:
self.rendology
    .start_frame(facade, (0.0, 0.0, 0.0), context.clone(), target)?
    .shadow_pass()
    .draw(
        &self.my_shadow_pass,
        &scene.my_cubes.as_drawable(&self.cube),
        &my_params,
        &Default::default(),
    )?
    .shaded_scene_pass()
    .draw(
        &self.scene_pass,
        &scene.cubes.as_drawable(&self.cube),
        &(),
        &draw_params,
    )?
    .draw(
        &self.my_scene_pass,
        &scene.my_cubes.as_drawable(&self.cube),
        &my_params,
        &Default::default(),
    )?
    .compose(&scene.lights)?
    .postprocess()?
    .present();
See examples/cube.rs for a more complete example.
Note that this is written from the perspective of an amateur game developer, so take everything with two grains of salt. Also, please keep in mind that Rendology is unstable, undocumented and not ready for general usage yet.
Background
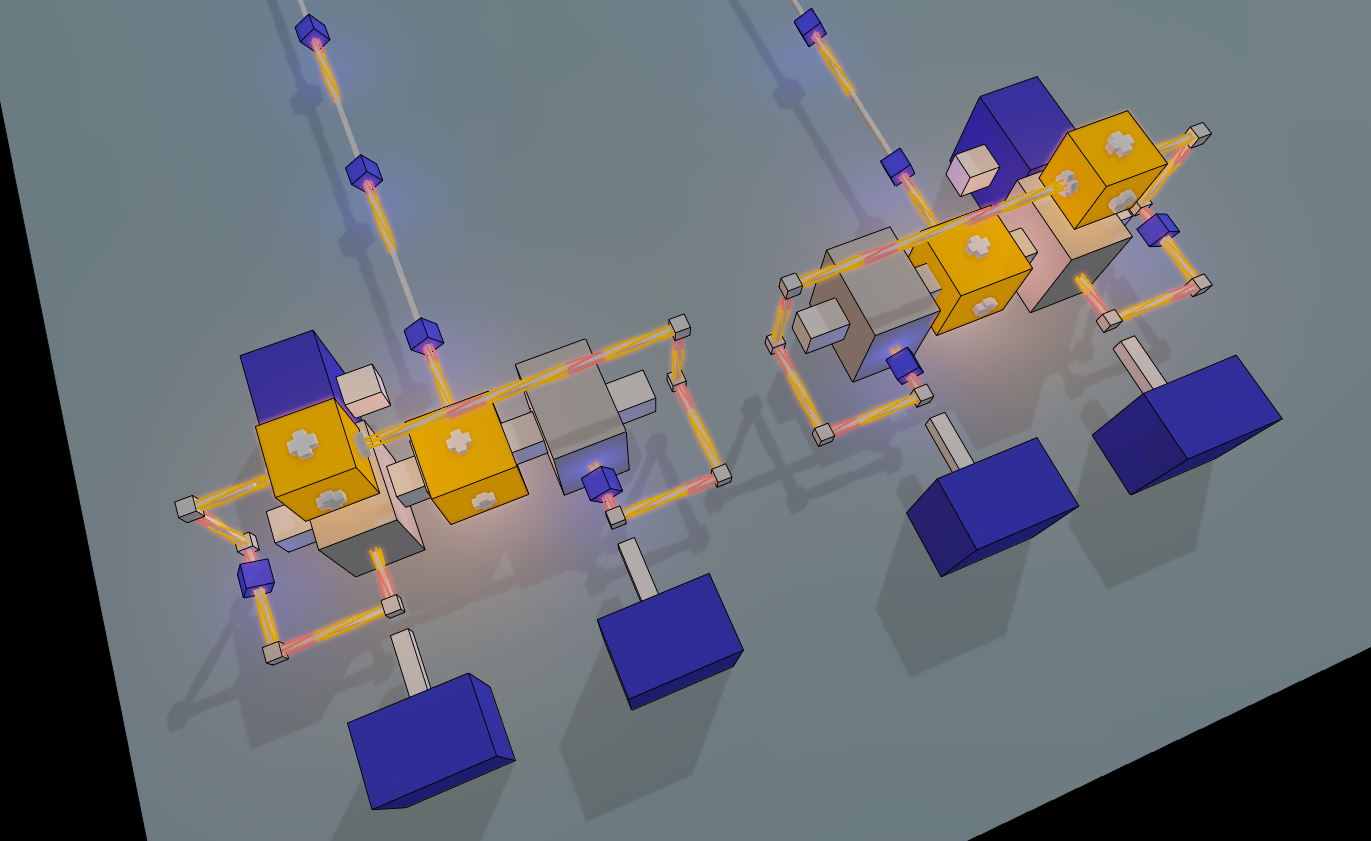
Rendology was split off from my puzzle game project Ultimate Scale. When I started this project, I wanted to focus on the game concept — certainly, I thought, drawing some plain cubes would more than suffice. Pretty soon, however, I got tired of looking at the graphics, so I inexplicably decided to implement simple versions of shadow mapping1 and deferred shading2. Later on, I added support for FXAA 3 and a glow effect.
It was important to me to allow turning off each of the rendering effects separately, so that development would be possible on my puny little laptop. Each combination of rendering effects needs a different shader, so you get a bit of a combinatorial explosion4. At first, I handled this by manually splicing together shader source fragments, adding a few lines here and there if some effect was enabled and so on. This worked fine for a while. Then, however, @Vollkornaffe came up with a great idea for a spiral effect, which would require doing some transformations in the vertex and fragment shader. I loved the idea, but then it hit me: since the core of the shaders would be different, I would need to once again implement support for all of the combinations of rendering effects around that!
Assumably, there are industry-proven solutions to this problem, but after some deliberation I came up with a somewhat overengineered (and yet hacky) method of successively transforming shaders. This method later turned into the core of Rendology.
Shader Cores and their Transformations
Rendology defines a shader::Core<P, I, V> as consisting of a vertex shader
shader::VertexCore<P, I, V> and a fragment shader shader::FragmentCore<P>. The type parameters
define data that has to be provided from the CPU side when drawing with the shader:
Pis per-draw-call uniform data,Iis per-instance data, andVis per-vertex data.
Rendology shader types store GLSL shaders in a decomposed form. Both vertex and fragment cores consist of output variable declarations, a body, and a list of output expressions. The fragment core additionally has input declarations for varying variables coming from the vertex shader. This decomposed form allows successive transformations to be applied to shaders.
Before we can look at an example
(full code: examples/shader.rs),
we need to define the data that flows into the shader:
use nalgebra as na;

struct Params {
    projection_matrix: na::Matrix4<f32>,
    view_matrix: na::Matrix4<f32>,
    light_pos: na::Vector3<f32>,
}

struct Instance {
    instance_matrix: na::Matrix4<f32>,
}

struct Vertex {
    vertex_pos: [f32; 3],
    vertex_normal: [f32; 3],
}

// (Skipping some trait implementations here.)
Given these definitions, we can define a simple shader:
use rendology::shader;

fn scene_core() -> shader::Core<Params, Instance, Vertex> {
    let vertex = shader::VertexCore::empty()
        .with_body(
            "mat4 normal_matrix = transpose(inverse(mat3(instance_matrix)));"
        )
        .with_out(
            shader::defs::V_WORLD_POS,
            "instance_matrix * vec4(vertex_pos, 1)",
        )
        .with_out(
            shader::defs::V_WORLD_NORMAL,
            "normal_matrix * vertex_normal",
        )
        .with_out(
            shader::defs::V_POS,
            "projection_matrix * view_matrix * v_world_pos",
        );

    let fragment = shader::FragmentCore::empty()
        .with_out(shader::defs::F_COLOR, "vec4(1, 0, 0, 1)");

    shader::Core { vertex, fragment }
}
A shader::Core can be compiled into raw GLSL code. Declarations for input
data types (e.g. Params) are generated implicitly.
You may notice that this shader is not very shady — it just outputs flat red colors.
Let’s define a shader core transformation, i.e. a function that takes a shader, modifies it in
some way, and produces a new shader. In this case, we will use the v_world_pos and
v_world_normal outputs of the above shader to calculate diffuse lighting.
fn diffuse_transform<I, V>(
    core: shader::Core<Params, I, V>,
) -> shader::Core<Params, I, V> {
    let fragment = core.fragment
        .with_in_def(shader::defs::V_WORLD_POS)
        .with_in_def(shader::defs::V_WORLD_NORMAL)
        .with_body(
            "
            float diffuse = max(
                0.0,
                dot(v_world_normal, normalize(light_pos - v_world_pos.xyz))
            );
            "
        )
        .with_out_expr("f_color", "diffuse * f_color");

    shader::Core {
        vertex: core.vertex,
        fragment,
    }
}
The fragment shader is transformed such that it now takes v_world_pos and v_world_normal as
varying input. As output, it scales the original f_color by the factor diffuse. The given
vertex shader is left unmodified. Note that diffuse_transform is generic in the instance data
I as well as the vertex data V; all that is required is that Params is given, so that we have
access to light_pos. Thus, the same transformation can be applied to different kinds of shaders.
While this is a simple case, the same principles are applied in the implementation of Rendology multiple times. A scene shader needs to be defined only once. Depending on the configuration of the pipeline, the shader then undergoes various transformations, by which support for shadow mapping, deferred shading and other effects may be added successively.
Rendering Pipeline
Rendology’s pipeline ensures at compile time that the necessary data for running your scene shader
is given when drawing. One only needs to implement the SceneCore trait for the scene shader.
For a full example, see
examples/custom_scene_core.rs,
where texturing is implemented. Then, it is possible to create shadow passes, shaded scene passes
and plain scene passes for your SceneCore implementation. The pipeline’s draw function for a
shaded scene pass is declared as follows:
pub fn draw<C, D, P>(
    self,
    pass: &ShadedScenePass<C>,
    drawable: &D,
    params: &P,
    draw_params: &glium::DrawParameters,
) -> Result<Self, DrawError>
where
    C: SceneCore,
    D: Drawable<C::Instance, C::Vertex>,
    P: shader::input::CompatibleWith<C::Params>,
Here, C::Params are the uniforms for C, C::Instance is the per-instance data and C::Vertex
is the mesh’s vertex type. drawable holds instances as well as the mesh that is to be drawn.
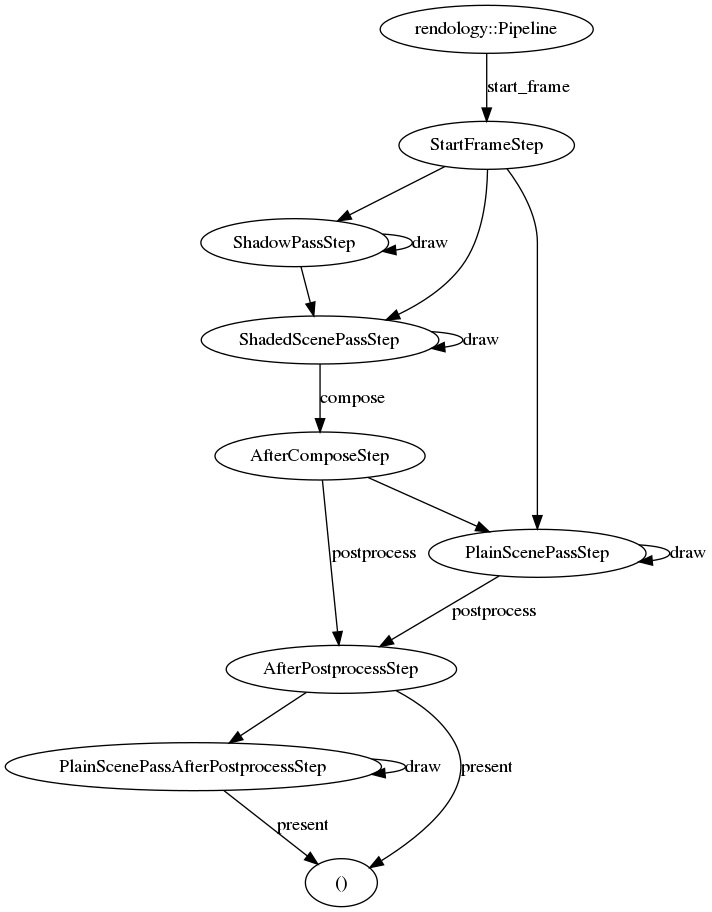
There is a certain order of operations that must be respected when drawing a frame. Consider the case of using shadow mapping and deferred shading. A typical frame may look like this:
- Clear buffers.
- Draw scene from the main light’s perspective, creating a shadow texture.
- Draw scene from the camera’s perspective, creating albedo and normal textures.
- Calculate light in another texture by making use of the normal texture.
- Compose by multiplying light and albedo texture.
- Draw plain and/or translucent objects.
- Apply postprocessing and present the frame.
Of course, there are many ways of messing up this order; for instance, it would not make sense to
create the shadow texture after step five. Rendology enforces this order of operations by defining
a series of types that represent a finite-state automaton. Each operation takes self by-move and
returns an instance of a type with the legal follow-up operations. Furthermore, the types are
annotated with #[must_use]. Taken together, these definitions ensure that whenever you start a
frame, you will follow a path through the automaton until the result is presented to the user.
The following diagram shows the paths that are currently possible when drawing a frame:
Footnotes
-
Glium’s shadow mapping example was of great help in this. ↩
-
Again, Glium’s deferred shading example was helpful. ↩
-
Or something resembling FXAA somewhat, hopefully. ↩
-
For example, the shaders for deferred lighting change slightly if you want to support shadow mapping, and then they change again if you want to add the glow effect into the pipeline. ↩